NEWS
SEENEY VISION

High-gloss product defect detection

(Summary description)In the industry, high-gloss materials are used to process some workpieces with high flatness and high surface requirements, such as mobile phone logos, light guide plates in military equipment, and other products. This type of work sample itself is mirror reflective, the work piece itself has high flatness, and it is easy to stick to oil stains, fingerprints, etc. Reflection problem: Because the surface of the material is very smooth, it has formed a high-gloss mirror. Even in a weak state, the reflection of the surface will have a very strong contrast. This contrast will cause impurities, scratches, and grinding on the surface itself. Defects such as marks are covered, so that the surface defects of the parts cannot be detected by visual photography. Reflection problem: Since the surface of the material has formed a mirror surface, ordinary optical lenses and lamp beads of the light source will form a reflection on the surface of the material. This reflection will be imaged on the final inspection screen, which will seriously affect the imaging effect of the material surface and cause detection. Unable to proceed. Traditional optical system imaging-lamp bead reflection (cannot be detected) solution: Reflection problem: BT series telecentric coaxial illumination imaging system uses parallel light The optical principle of reflected illumination and parallel light imaging can perfectly solve the problem of mirror reflection. Even if there are tiny scratches, scratches, fingerprints, oil stains and other defects on the surface, they will be presented with high grayscale contrast, which greatly reduces Difficulty of image algorithm in later stage Reflection problem: BT series coaxial illumination imaging system (BT-2348+BT-CP64/X parallel coaxial light), high parallelism of the optical path, uniform spot and full coverage of the test sample itself, will not cause the system hardware on the mirror itself Reflection
(Summary description)

In the industry, high-gloss materials are used to process some workpieces with high flatness and high surface requirements, such as mobile phone logos, light guide plates in military equipment, and other products.

This type of work sample itself is mirror reflective, the work piece itself has high flatness, and it is easy to stick to oil stains, fingerprints, etc.

Reflection problem: Because the surface of the material is very smooth, it has formed a high-gloss mirror. Even in a weak state, the reflection of the surface will have a very strong contrast. This contrast will cause impurities, scratches, and grinding on the surface itself. Defects such as marks are covered, so that the surface defects of the parts cannot be detected by visual photography.

Reflection problem: Since the surface of the material has formed a mirror surface, ordinary optical lenses and lamp beads of the light source will form a reflection on the surface of the material. This reflection will be imaged on the final inspection screen, which will seriously affect the imaging effect of the material surface and cause detection. Unable to proceed.

Traditional optical system imaging-lamp bead reflection (cannot be detected)

solution:

Reflection problem: BT series telecentric coaxial illumination imaging system uses parallel light

The optical principle of reflected illumination and parallel light imaging can perfectly solve the problem of mirror reflection. Even if there are tiny scratches, scratches, fingerprints, oil stains and other defects on the surface, they will be presented with high grayscale contrast, which greatly reduces Difficulty of image algorithm in later stage

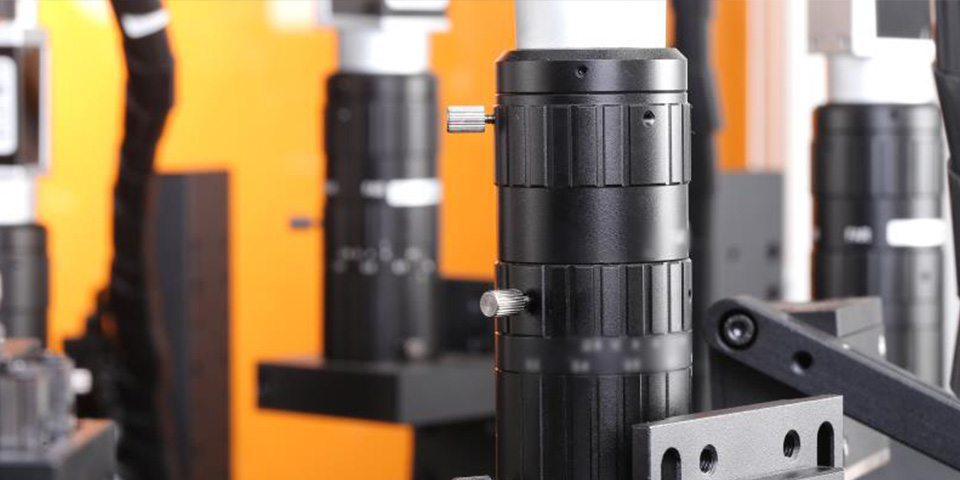
Reflection problem: BT series coaxial illumination imaging system (BT-2348+BT-CP64/X parallel coaxial light), high parallelism of the optical path, uniform spot and full coverage of the test sample itself, will not cause the system hardware on the mirror itself Reflection

Information

In the industry, high-gloss materials are used to process some workpieces with high flatness and high surface requirements, such as mobile phone logos, light guide plates in military equipment, and other products.

This type of work sample itself is mirror reflective, the work piece itself has high flatness, and it is easy to stick to oil stains, fingerprints, etc.

Reflection problem: Because the surface of the material is very smooth, it has formed a high-gloss mirror. Even in a weak state, the reflection of the surface will have a very strong contrast. This contrast will cause impurities, scratches, and grinding on the surface itself. Defects such as marks are covered, so that the surface defects of the parts cannot be detected by visual photography.

Reflection problem: Since the surface of the material has formed a mirror surface, ordinary optical lenses and lamp beads of the light source will form a reflection on the surface of the material. This reflection will be imaged on the final inspection screen, which will seriously affect the imaging effect of the material surface and cause detection. Unable to proceed.

Traditional optical system imaging-lamp bead reflection (cannot be detected)

solution:

Reflection problem: BT series telecentric coaxial illumination imaging system uses parallel light

The optical principle of reflected illumination and parallel light imaging can perfectly solve the problem of mirror reflection. Even if there are tiny scratches, scratches, fingerprints, oil stains and other defects on the surface, they will be presented with high grayscale contrast, which greatly reduces Difficulty of image algorithm in later stage

Reflection problem: BT series coaxial illumination imaging system (BT-2348+BT-CP64/X parallel coaxial light), high parallelism of the optical path, uniform spot and full coverage of the test sample itself, will not cause the system hardware on the mirror itself Reflection

NewsDetail

Relevant Information

Visual inspection system of stamping parts size of stamping machine

Visual inspection system of stamping parts size of stamping machine

For the visual inspection of the size and defect of the stamping parts of the press, Xinwei Vision has developed a set of automatic visual inspection system SVMS, which has been widely used in several automation equipment manufacturers. 5-25-3 5-4 System solutions: 1. Adopt 5 million high-speed industrial camera, Gigabit Ethernet interface, stable data transmission. 2. 25mm fixed focal length industrial lens, capturing the full resolution of mega-pixel cameras, low distortion rate (less than 1.0%), locking adjustment screws for focus and aperture, and high contrast and sharpness images across the entire screen . 3. 150mm LED industrial backlight: AFT-BL series LED backlight is composed of high-brightness, long-life LED light-emitting tubes, which can fully highlight the contour information of the measurement or detection object. 4. 14-inch touchable integrated industrial computer processor, 2* Gigabit Ethernet port, 8 input and 8 output I/O card, RS232\485 interface, Intel Core I7, 3rd generation desktop processor, dual-core four-thread, 3M cache, Main frequency 3.3GHz, 2G memory, 500G mechanical hard drive. 5. Independently develop intelligent software. System functions: 1. Strip size detection, hole diameter detection; 2. The connection between the holes is broken, and the two holes are not well stamped and combined for detection; 3. Detection of the number of holes; 4. Detect the position of the material belt, send data and adjust the PLC control system accordingly; 5. Detection accuracy: 0.03mm; 6. Automatic rejection, alarm signal output, bad statistics and storage of bad data. System Features: 1. Detection rate: 100% defective detection 2. No contact, no interference 3. It can detect multiple rows of holes at the same time, 0.2 seconds/piece 4. Weishi intelligent software, modularized software operation, simple and easy to learn, the operator can get started in 10 minutes 5. It is suitable for the detection of any shape stamping parts and any hole 6. Visual monitoring, real-time visibility of current product production quality.
Robot vision system guides positioning and grasping

Robot vision system guides positioning and grasping

With the continuous development of industrial technology, industrial robots (manipulators) have become the core components of smart factories; from the Tesla smart factory last year, the processing and assembly smart factories of different car brands, and even the Xiaomi "Black Light Factory" announced by Lei Jun (The efficiency is more than 60% higher than that of the traditional factory), the application transformation of the production line of the manipulator has become an important trend for enterprises to improve production efficiency and reduce costs. To Robot vision system In the transformation of industrial robots (manipulators) application projects, the core is the vision guided positioning system, which mainly includes technologies such as dynamic tracking and positioning, precise positioning and assembly, and precise position adjustment. At present, a set of robot visual positioning system with excellent performance, strong compatibility, convenient application, and high positioning accuracy has become a popular focus and demand point of production line transformation. To Robot vision system vision guidance The "Manipulator Vision System" launched by Vision Intelligence is fully compatible with industrial manipulators from domestic and foreign manufacturers, and can be equipped with 4 cameras to work at the same time to generate 360° images without dead angles. The grasping and detection are not affected by the position of the workpiece. Realize functions such as dynamic tracking and positioning, precise positioning and assembly, and precise position adjustment. 1 Fully compatible with mainstream manipulators and PLC control systems PLC control system The robot vision system is fully compatible with mainstream robots and PLC control systems such as ABB, KUKA, FANUC, MITSUBISHI, EPSON, YAMAHA, DENSO, SIEMENS, OMRON, DELTA, Panasonic, etc. Through system configuration, the task configuration of the vision robot is completed to realize intelligent production . To 2 Powerful functions, full-scene application Robot vision system application case For different application scenarios, the robot vision system can meet the needs of robot multi-camera application positioning, dynamic positioning and grasping, and posture adjustment positioning. Through the core algorithm of Weishi Intelligent Manufacturing, the robot vision system is widely used in lamination positioning, printing positioning, assembly positioning, and picking positioning. At the same time, it supports multi-dimensional statistics and analysis, and can be configured with multiple functional modules to achieve high-precision and high-efficiency production testing.
High-gloss product defect detection

High-gloss product defect detection

In the industry, high-gloss materials are used to process some workpieces with high flatness and high surface requirements, such as mobile phone logos, light guide plates in military equipment, and other products. This type of work sample itself is mirror reflective, the work piece itself has high flatness, and it is easy to stick to oil stains, fingerprints, etc. Reflection problem: Because the surface of the material is very smooth, it has formed a high-gloss mirror. Even in a weak state, the reflection of the surface will have a very strong contrast. This contrast will cause impurities, scratches, and grinding on the surface itself. Defects such as marks are covered, so that the surface defects of the parts cannot be detected by visual photography. Reflection problem: Since the surface of the material has formed a mirror surface, ordinary optical lenses and lamp beads of the light source will form a reflection on the surface of the material. This reflection will be imaged on the final inspection screen, which will seriously affect the imaging effect of the material surface and cause detection. Unable to proceed. Traditional optical system imaging-lamp bead reflection (cannot be detected) solution: Reflection problem: BT series telecentric coaxial illumination imaging system uses parallel light The optical principle of reflected illumination and parallel light imaging can perfectly solve the problem of mirror reflection. Even if there are tiny scratches, scratches, fingerprints, oil stains and other defects on the surface, they will be presented with high grayscale contrast, which greatly reduces Difficulty of image algorithm in later stage Reflection problem: BT series coaxial illumination imaging system (BT-2348+BT-CP64/X parallel coaxial light), high parallelism of the optical path, uniform spot and full coverage of the test sample itself, will not cause the system hardware on the mirror itself Reflection
1 minute to understand barcode/QR code recognition and detection

1 minute to understand barcode/QR code recognition and detection

Barcode/QR code has the characteristics of large storage capacity, strong confidentiality, high traceability, strong resistance to damage, and low cost. It has penetrated into every corner of our lives, and has spawned with barcode/QR code as the connecting carrier. New ecological chain in more fields. In many fields such as industrial automation, logistics, food, wholesale, and medical supplies, barcodes/two-dimensional codes play a vital role. Barcodes/two-dimensional codes (QR codes, DataMatrix codes, MaxiCode codes, Aztec codes, etc.) are recognized As a result, detection has received more and more attention from automated production and application companies. For the two-dimensional code recognition technology, traditional code readers are not only susceptible to environmental influences during the recognition process, but also have limitations for reading multiple codes at the same time. This requires high-resolution industrial cameras and machine vision technology for image preprocessing, decoding, and error correction. In the product production process, the VisionBank intelligent vision system can be used for multi-threaded tracking and recognition of product barcodes/two-dimensional codes. The intelligent vision system performs detection and comparison with the bar code information identified by the bar code according to the length of the bar code or the content of the bar code, and gives a judgment. The two-dimensional code is detected with a size of 2mm, and the VisionBank intelligent vision system uses a lens with a larger magnification, which can be easily identified. For some special scenes, multiple small-size QR codes need to be recognized at the same time in a larger field of view. The MV-EM series high-speed industrial cameras and the flexible VisionBank intelligent vision system can solve them perfectly.

Copyright  © 2021 Seeney Vision Intellgent Robot